

Friday, February 1, 2013

Thursday, January 31, 2013
Copper Ring
I made my first copper ring with my first set stone recently. I made it on a whim really, I set out that day to do some filigree. Instead, I started pounding out a piece of copper. It was also my first weld from home. I had almost convinced myself I had the wrong torch for the job, but with a little patience and lots of study, I figured it out. My seam could have been better. The setting isn't perfect, but I am still excited to have the result I got!

Thursday, January 17, 2013
Textured Copper Link Bracelet
After working on a few single pieced forged bracelets, I decided to try my hand at cutting and shaping. I cut five links out of sheet copper and textured and formed them. I then drilled holes and linked them together. I finished the piece by adding an adjustable chain and lobster claw clasp.
I used two textures in this bracelet, one for the focal and another for the side links.

I used two textures in this bracelet, one for the focal and another for the side links.

Friday, January 11, 2013
Forged Part 2
I also received some tools and gift certificates for metalsmithing for Christmas (I know, I am super lucky!).
Once my new hammers, blocks and firing materials arrived, I was able to experiment a bit more from my home shop.
It has been incredibly satisfying and fun. I made a men's bracelet and a small woman's cuff. I decided to leave these open rather than solder them closed.
On the woman's cuff, I hammered the ends until they were flared and I rounded the edges.I squared off the top.

On the men's bracelet, I left it more round and I added a suede accent:

Once my new hammers, blocks and firing materials arrived, I was able to experiment a bit more from my home shop.
It has been incredibly satisfying and fun. I made a men's bracelet and a small woman's cuff. I decided to leave these open rather than solder them closed.
On the woman's cuff, I hammered the ends until they were flared and I rounded the edges.I squared off the top.

On the men's bracelet, I left it more round and I added a suede accent:

Wednesday, January 9, 2013
Fused Part 1
I have very generous family this year. My uncle gave me a small glass fusing kiln for Christmas. It has been a lot of fun to play with so far. I made a couple of pieces just playing around. I expected the first few to fail terribly, but they actually fused properly. Another skill down and it really feels awesome! I only planned out one of the four pictured. Now that I understand the process, I'll need to take the composition more seriously.

I would love to use this technique together with my metal smithing skills.

Monday, January 7, 2013

Sunday, January 6, 2013
Forged Part 1
My awesome boyfriend got me metal smithing lessons for my birthday back in November. I am a little late in posting what I made. A simple copper bangle. Not much to it, but I am still proud of my new found skill!

Tuesday, July 31, 2012

Monday, July 16, 2012
Colors of Ecuador
Lindsay from Lindsay Blogs is going to Ecuador this Fall. She is going to help and do some good. To support her loving effort, I made a necklace that she could auction or sell to go towards the trip. We thought it would be great if the necklace could reference something related to Equador.The colors of the Equador flag are bold yellow, blue and red. I used yellow, blue and red ceramic beads to reference the flag colors and I think it turned out beautifully.
If you are interested in Lindsay's story, check out her blog at http://www.lindsayblogs.com/.
Her trip is in September and she is really excited about the wonderful people she will meet and memories that will be made.
![]()
![]()
If you are interested in Lindsay's story, check out her blog at http://www.lindsayblogs.com/.
Her trip is in September and she is really excited about the wonderful people she will meet and memories that will be made.


Sunday, March 4, 2012
Painted Easter Egg Tutorial
Spring is in the air again! I just love the pastel colors and sweet baby animals Easter brings each year.
To celebrate, I put together a little tutorial for you!

I used store bought papier mache eggs. These craft paper eggs can be found inexpensively in most craft stores.

I painted the egg form with gesso to have an even painting surface to start with. This will also make the colors more "true". Lower quality paints, or even some colors of good quality paints might be more transparent and they could appear muddy over the craft paper base. Applying gesso also creates a barrier between the base material and the paint, making the paint layer more stable.

This egg is plaid, so I started the first grid pattern in one color. Then I applied each additional color in its own pattern. You don't have to do plaid, you can use stripes, polka dots, wavy lines or whatever suits your taste.

In this example, I used a light blue base and pale purple, yellow and pink lines for the pattern.

Voila! A basket of eggs that you can enjoy each Spring and Easter for years to come.

Monday, February 20, 2012


Friday, January 6, 2012
2012 Ornament
Introducing the 2012 ornament for my son and nephew. This year, I experimented with a hollow ornament with a little character holding their "Christmas Number" One had a mouse, the other a bear and both oh-so-cute if I do say so myself.

Saturday, December 31, 2011

Friday, December 30, 2011
Blue Christmas
A few weeks ago, I made some jewelry to go with my dress for my company's annual Haolday Gala. The dress was navy blue with an asymetrical neckline and a beaded accent on one shoulder. So I made a necklace that followed the neckline shape and a bracelet to continue the look. All in all, the bead work took about 10 hours to complete and it was the first time I had attempted something like this, although it has been on my "to-do" list for a few years:


Wednesday, December 7, 2011
I Wish You A Blingy Christmas
Last weekend I went to an open house craft show. I wanted to bring something a little different. While browsing through the craft aisles, it hit me: BLING. Yup. Bling. So rhinestones, sequins and beads galore resulted in a very blingy group.
So fab!

So fab!

Wednesday, November 30, 2011

Friday, November 11, 2011
Twisted (but in a good way)
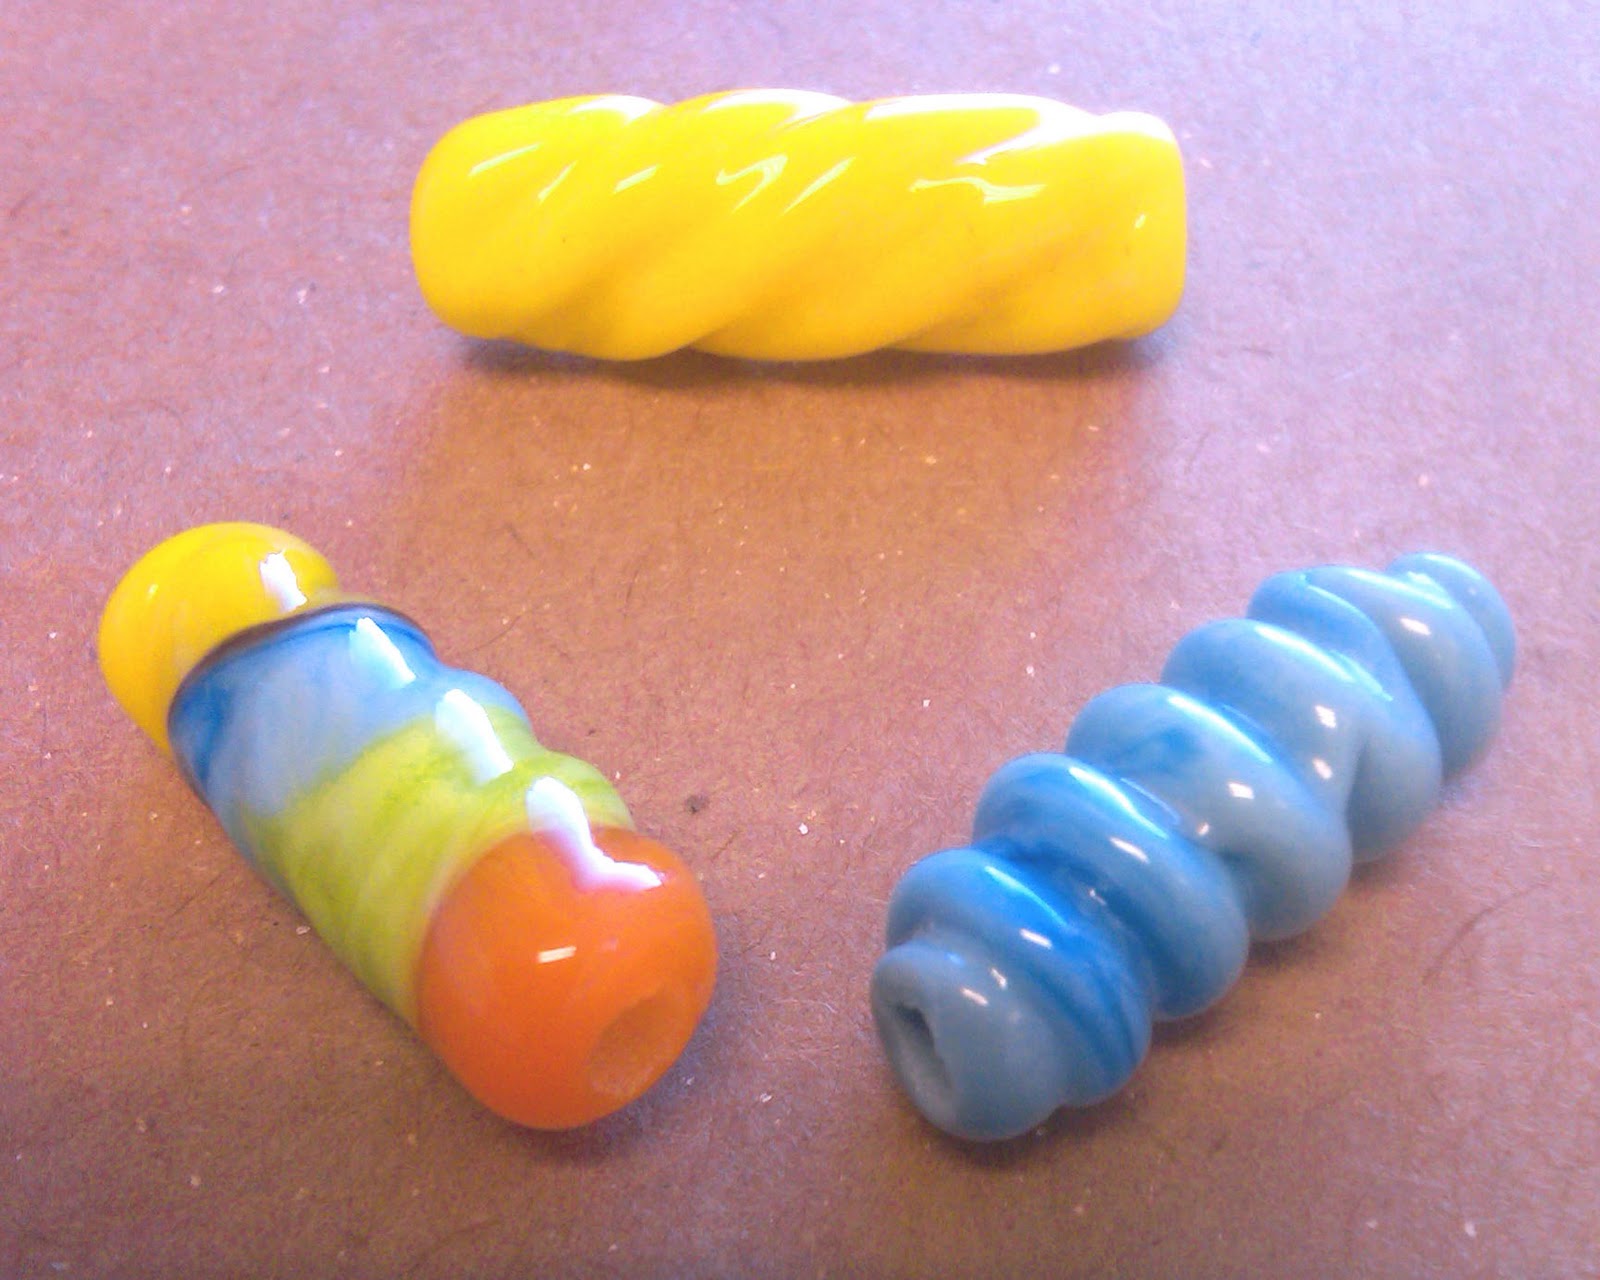
My larger tube beads arrived and I am pretty pleased with the results! There was a little bit of a reaction between the yellow and the blue on the multicolored bead, but otherwise, they are bright and fairly uniform. Yay!
Saturday, November 5, 2011
All Fired Up!
I am so excited!
Two years ago, my boyfriend bought me an amazing gift- a glass bead kit. I gave him a list of things I would like for Christmas and where they could be found, etc. and that was one of the items. I was SUPER excited when I opened it. He is a little craft oblivious, so he was a little surprised to find out it had a blow torch in it. Yes. You read that right. I was pregnant at the time, so I didn't dig right in. Come the following Spring after my son was born, I decided I wanted a little guidance before I tried it. So I added classes to my wish list the following year. My mom found a great class for me to take where I could learn safety and technique. Here we are, almost a year later and I found the time to take the class. Thanks to two very generous gifts from two people I love, I have a new favorite art form!
My teacher, Diane http://www.dkdesigns.biz was so helpful and informative. She has a lot of experience and it showed. Under her tutelage, I was able to make some really great beads:


Two years ago, my boyfriend bought me an amazing gift- a glass bead kit. I gave him a list of things I would like for Christmas and where they could be found, etc. and that was one of the items. I was SUPER excited when I opened it. He is a little craft oblivious, so he was a little surprised to find out it had a blow torch in it. Yes. You read that right. I was pregnant at the time, so I didn't dig right in. Come the following Spring after my son was born, I decided I wanted a little guidance before I tried it. So I added classes to my wish list the following year. My mom found a great class for me to take where I could learn safety and technique. Here we are, almost a year later and I found the time to take the class. Thanks to two very generous gifts from two people I love, I have a new favorite art form!
My teacher, Diane http://www.dkdesigns.biz was so helpful and informative. She has a lot of experience and it showed. Under her tutelage, I was able to make some really great beads:


The first few were a little tricky, but in the end, I had some nice matched pairs that I was happy with. We also made some larger beads that I will post another day. They needed to anneal (see how I used my fancy glass art term there?) for strength.
Since I have my own torch and supplies, I hope to have more examples to show you soon!
Tuesday, October 18, 2011
New Friends
I haven't made anything for the Pumpkin Monkey lately (bad mommy). So I decided to fix that. As I have mentioned before, his room has a forest theme with lots of woodland animals. Here are the latest forest friends:


Monday, September 19, 2011
That Time of Year
Do you feel the chill in the air? We finally have a break in the exeedingly hot weather in Georgia. I walked outside last week and I didn't have my breath taken away by the wall of heat. Instead, it was... comfortable!
When the weather changes, I know all those great holiday things are right around the corner. The first of which is Halloween! Check out the lastest of the creepy crawly Fear Things collection:


When the weather changes, I know all those great holiday things are right around the corner. The first of which is Halloween! Check out the lastest of the creepy crawly Fear Things collection:


Granted, these might create some all-together different chills, but fun all the same!
Subscribe to:
Posts (Atom)